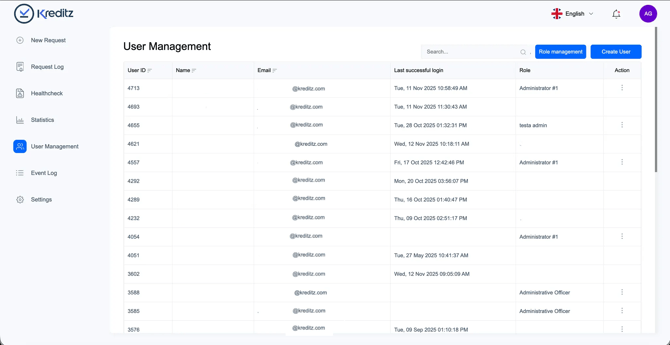
Click User Management in the left-hand navigation menu to view and manage all users in your account.
User List Overview
The user list gives you a clear overview of all users connected to your account, along with key details that help you understand who has access and what they can do.
Here, you can see:
-
User ID – The unique identifier assigned to each user.
-
Name – The full name of the user.
-
Email – The email address linked to the user’s account.
-
Last Successful Login – The most recent date and time the user successfully logged in.
-
Role – The role assigned to the user, which determines their permissions.
-
Action – A menu available to Administrators for editing or deleting users.
This overview gives you a quick, organized snapshot of your user base, making it easy to manage access and keep your account secure.
Default User Roles
Administrator
The Administrator role is the highest-level role available. Administrators have full access to all features in the account and are responsible for managing users and permissions.
Administrators can create, edit, and delete users.
If the account includes connected sub-accounts, Administrators can also switch between these accounts.💡 For more information, see the How do I switch between sub-accounts?
By default, Administrators have access to:
-
New Request
-
Request Log
-
Healthcheck (must be activated in Role Management)
-
Statistics
-
Event Log
-
Settings
Administrator Officer
The Administrator Officer role has more limited access compared to a full Administrator. However, Administrators can adjust and expand these permissions at any time through Role Management.
By default, Administrator Officers have access to:
-
New Request
-
Request Log
-
Statistics
-
Settings
💡 Want to create a custom role? See the Role Management.
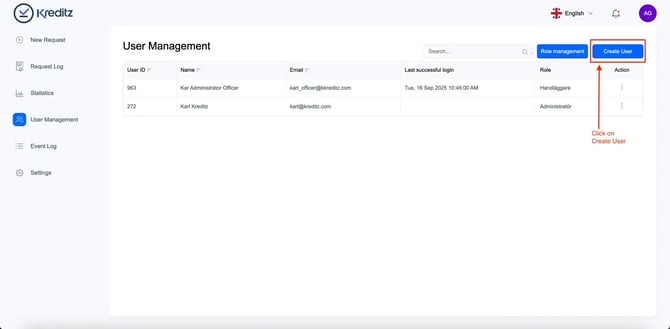
Create a User
To add a new user, navigate to User Management. In the upper-right corner, you’ll find two options: Role Management and Create User.
Click Create User to begin adding a new user to your account.
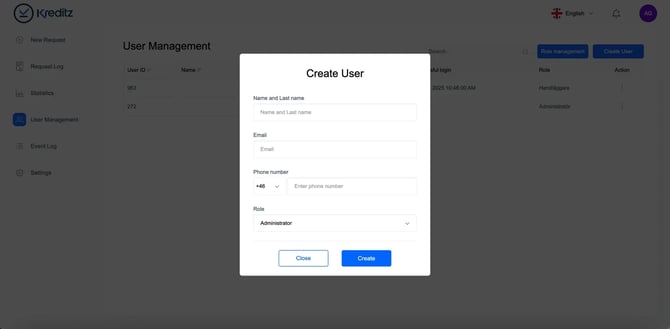
When creating a new user, you’ll need to fill in the required user details:
-
First Name and Last Name
-
Email
-
Phone Number (optional — recommended to leave empty)
-
Role
Once all information has been added, click Create to complete the setup and add the user to the account.
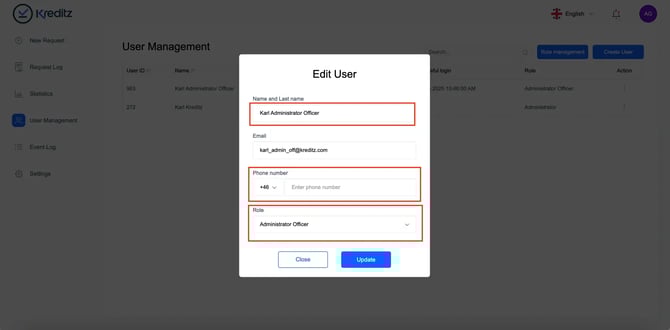
Edit User
To edit an existing user, go to the Action column on the right side of the user list. Click the three-dot (…) menu next to the user you want to update and select Edit.
You can modify:
-
First Name and Last Name
-
Phone Number
-
Role
After making your changes, click Save to apply the updates.
❗ Please note: Email addresses cannot be edited directly in Vista. If an email change is required, please contact Kreditz Support (support@kreditz.com).
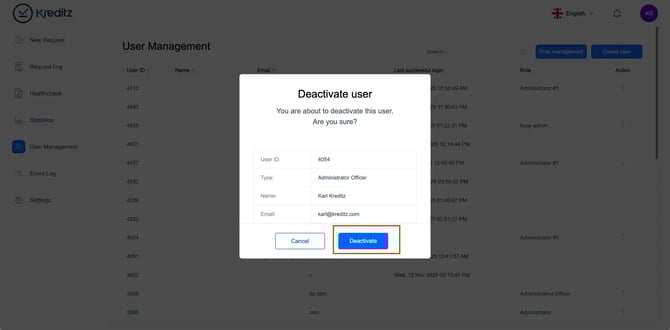
Deactivate User
To deactivate a user, follow the same steps as editing. In the Action column, click the three-dot (…) menu next to the user you want to deactivate and select Deactivate.
In the confirmation popup, click Deactivate User to finalize the action.
Once deactivated:
-
The user will no longer have access to the account.
-
They will still appear in the user list, but will be clearly marked in red to show their inactive status.
💡 Tip: Deactivation is a good option when a user no longer needs access but you still want to keep their historical data for reference.